
This page describes the four permanent panels. The others are shown on the pages describing the main windows to which they relate (see links on the left).
The entire control panel can be hidden if desired, to allow the main part of the window to occupy the full width of the screen.

|
This panel provides the most frequently used controls for operating the program. You can choose the tower, the set of bells, and what you want to ring. You can start and stop the ringing and make calls.
Solo Go is a feature designed for people who practise alone. When this box is ticked and Start is pressed (to start ringing a method) the program will ring rounds until you join in with your own bell, then ring a few more rounds before starting into changes. This behaviour can be fine-tuned on the Settings panel. Start with... allows you to start the bells ringing in an order other than rounds if desired. Note: while method ringing is underway, this option is replaced with buttons for Bob, Single and any other calls that may be defined for that method, or a "Call" button for stepping through pre-defined call change sequences manually. Analyse real ringing will record and analyse normal ringing with a real band (provided you have a sensor on every bell). If you are running a silent practice, tick the "want sound" option; for real ringing, where the bells can be heard normally, clear this box and the program will not generate any bell sounds during your ringing (it will still generate sounds during simulator ringing, so these two options can be left as you want them permanently if desired). |
|
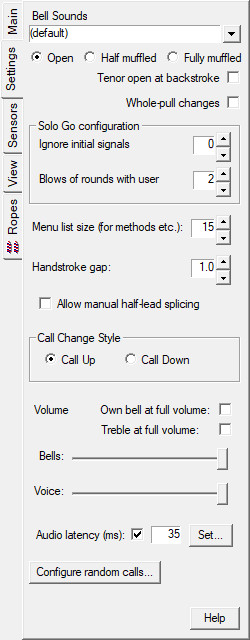
The Settings panel contains a collection of assorted options and preferences.
The Bell Sounds selection at the top allows you to choose from a selection of bell recordings related to the tower you chose on the Main panel. The default "Twelve Bells" tower also includes a piano and a novelty "Chromatic" option. Users of dumbbells without stays will welcome the Solo Go configuration options. You can instruct the program to ignore a specific number of initial signals from the sensor, which gives you a chance to lift the bell up to the starting position without triggering the normal start behaviour. Audio latency provides support for audio devices such as Bluetooth where there is sometimes a noticeable delay. Specify the delay in milliseconds and the program will generate sounds early to keep them synchronised with the graphics. (Please read the program's help file in relation to this feature as the latency for Bluetooth can be inconsistent unless certain steps are followed.) Configure random calls... opens a dialog allowing you to set the relative frequencies of plain leads, bobs and singles (and other types of call if there happen to be any). These settings are then used when practising methods with calls made at random. |
|
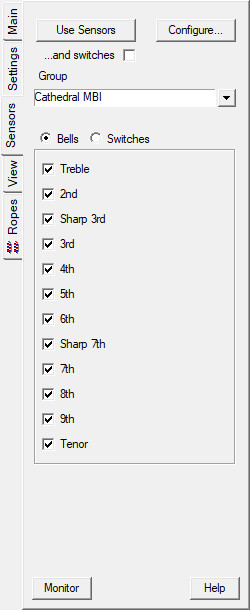
The Sensors panel allows you to configure and use sensors attached to bells, and control switches (usually operated by the foot).
You can define sensors in separate groups - useful for computers that move between locations or for different options within a tower for silent practice.
Types of Bell SensorVirtual Belfry supports three sensor types:
Signal MonitorPress the Monitor button at the bottom to show details of all the signals received by the program and how they are handled. This applies to both bell sensors and control switches (see next). |
|
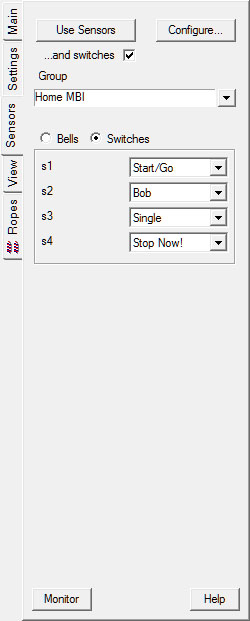
Click on the Switches radio button (on the Sensors control panel) and the list of sensors (shown above) is replaced by a list of control switches, shown here (assuming you have defined some). The function that each switch performs is chosen directly on the control panel, via a drop-down list provided for each switch.
Types of SwitchThe same three sensor types defined for bell sensors can also work for switches. In addition, Virtual Belfry also allows the DigiBee PC control board to be used as an interface for switches. |
|
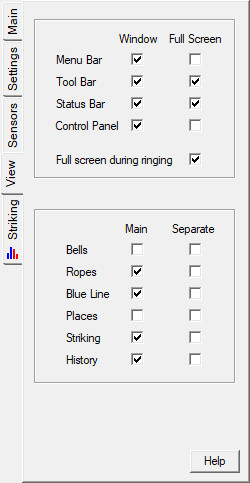
The View panel allows you to turn various features on or off, allowing you to set up a difference in the view when running in a window versus full screen and also to remove unwanted views from the program (the Belfry view, for example, isn't wanted during simulator ringing).
It also allows you to move one or more of the views in the program's main window into separate windows, so that you can, for example, have the ropes and the blue line windows showing simultaneously. Separate windows (or the main window itself of course) can be dragged onto a different screen if you have one or more additional screens configured to extend the size of the primary screen. Note that the two tick boxes for the Bells window will be disabled if the belfry images have not been installed for the current tower (on the main control panel - see top - there is a drop-down list of towers). If belfry images are available for the current tower, they can be purchased separately (more about this). |
These panels are described along with the windows to which they relate (see the links further up on the left side of this page).